Saturday, February 25, 2012

Go Outside and Play - A Bonfire and Hot Chocolate

Go Outside and Play!
Did you ever say that to your kids?
I do.
A lot. 
Sometimes it's how I keep my sanity.
Sometimes it's because it's a beautiful day.
Sometimes it's a great way to spend time together as a family...like today.


We have lots of bonfires outside in the fall.
S'mores, hot dogs {or the little irons stuffed with lots of yummy things} and a bonfire makes any kid happy.
But we thought a hot bonfire on a cold winter would be fun too.


We covered stumps with blankets so we had a warm place to sit.


I made our two favorite flavors of hot chocolate.
We let the kids invite some friends to join us.
And added a few treats for an extra sugar buzz.


Chocolate covered pretzels are always a hit.


Puppy chow showed off in some fancy little jars.
{Although, I came up with the decorations, I got the puppy chow in jars idea from Pinterest.}


We had crushed mint candy or homemade snowflake marshmallows to add to the hot chocolate.


Marshmallows were a hit.


The hot chocolate is from a mix...so easy to whip up.


I used these cute little note cards as coasters.
I added everyone's initials with brown stickers so everyone could keep track of their mug.
It worked perfectly.


The kids managed to find a bit of snow here and there.


Every drop of hot chocolate disappeared.


We had so much fun.


I have to tell you...
My Kids Took Every Single Picture For This Post!
I am so proud of the great job they did.
I loved watching them work together.
I hope you get some time to go outside and play this winter.


Thursday, February 9, 2012

Lunch Lady - Easy Fish For One

Every morning we pack lunches for the kids and my husband.
They go off with their lunch boxes and coolers packed to the brim with nutrition.  
My daughter and I get to stay home and whip up whatever we want for lunch.
Which sounds great, but it's sort of more difficult than it sounds sometimes.
Do you ever wonder what to eat for lunch?

We like to make a batch of egg salad and have that on hand for a quick sandwich.
Tuna salad is also a great thing to have in the fridge.
Honestly, though cold salades to stuff in some bread can get real old, real fast.
So we try to mix it up a bit with a hot and quick meal every once in awhile.
Lately a favorite has been fish {any kind of fish} with a lemon sauce.


It is so yummy.
It is so healthy.
It is so easy.
It is so quick.

Let me show you how to whip up a quick and easy gourmet entree in less than ten minutes.
The board of ingredients are pretty simple.
Any kind of frozen white fish you like can be used AS LONG AS IT IS WILD CAUGHT.
I am begging you not to eat farm raised fish.
Just look on the package of fish to see what you are buying.
I bought a bag of wild caught Whiting fish for $5.00 at Wal Mart.

Now for the board of ingredients for our super fast, super good lunch.
  • White Wine or Stock 
  • Extra Virgin Olive Oil
  • Salt & Pepper
  • Italian Parsley
  • Lemon
  • Green Beans
  • Butter
  • Fish


Let's make the green beans first. 
I have a unique way of making green beans.
Put the beans in a pan with enough water to partially cover the beans.
I also add a pinch of salt...but that is optional.


Bring the water to a boil over high heat.


Pour the boiling water out of the pan when the beans turn bright green.
They will still be crispy, but don't worry.
Put a lid on the beans.
Put the pan back on the burner with the heat turned off.
Let the beans sit in the pan until you are ready to serve the meal.
They will soften up and be so yummy without turning grey and losing all their vitamins. 


Now, let's cook the fish.
Add a drizzle of olive oil to a non-stick pan over medium high heat.


Add the fish to the pan.
Season the fish with salt and pepper on both sides.


While the fish cooks on one side, pick some parsley leaves.


Chop them up a bit.


Slice two thirds of the way through a slice of lemon.
A twist of lemon is so pretty on a piece of fish.


Our fish is looking very good.
See that white bubbly stuff along the side of the fish?
That is going to be great in the sauce.
When the fish is cooked through remove it from the pan and put it on a plate.
Don't forget to add your fancy slice of lemon to the fish.


Add lemon juice and a splash of white wine to the pan. 


When the lemon juice and white wine have cooked down a bit, turn the heat off.
Add a pat of butter to the pan.  
Use a whisk to stir the melting butter into the reduced liquids.


Toss in the chopped parsley.
Swirl the sauce a bit to mix in the parsley.


This is making me very happy.


We are going right over the top of the lemon with this spoon of sauce.
It will drip down through the lemon and be so yummy.


Don't forget our lovely and tender green beans.


Bon Apetite!

Thursday, February 2, 2012

Super Food for the Super Bowl - Onion Rings

What is your favorite part of the Super Bowl?
The football?
The commercials?
The halftime show?
Or the food?

We are pretty healthy eaters, but when it comes to the Super Bowl...it's all about the junk food.
This year we are having sliders, coleslaw, guacamole, salsa, tortilla chips and onion rings.
We kind of sort of have a love affair with onion rings.
We do have a love affair with onion rings. 


Making them is actually quite simple and economical.
This is a great non-recipe cooking method.
The board of ingredients is pretty simple stuff.
  • Canola Oil
  • Milk - I am using skim
  • Corn Starch
  • Flour
  • Sweet Onions
  • Salt


Start by slicing your onions. 
I used medium sized onions and got about eight slices per onion.
I would slice them however you want.
Thick, thin or in between is fine for this recipe.


Separate the rings from each slice.
Hold the slice of onion over the bowl and start with the small middle ring.
The rings fall apart very easily if you start in the middle.....I discovered that on the last slice.


Add milk to the bowl of onion rings.
You don't need to cover the onions with milk just add enough to get the rings wet.


Now, let's make the crunchy coating.
Start with corn starch in a bowl.
I am using one and a half cups of corn starch.


Add the flour...
I am using a half cup of flour because we like crunchy onion rings.
If you wanted softer rings, use less starch and more flour.


...and salt.
Can you see the tiny patch of salt on the flour?
I don't suppose these are the most thrilling pictures I have ever posted.
Anyway, give it all a stir with a whisk.


This is the dredging station that I set up for myself.
I will be working from right to left.
I'll use my right hand to pick up wet rings and I'll drop them into the bowl of corn starch and flour.
I'll use my left hand to shake the bowl, coat the rings, shake them off and move them to the cooling rack.
The cooling rack will hold the rings, but allow any excess flour mixture to fall away.


Here are some wet rings in the starch mixture.


I shook the rings over the bowl of starch.  
When I dropped them onto the rack, even more starch fell off.
We just saved that starch from burning on the bottom of the pan of oil. 


When you get all the rings coated, give the rack a few shakes to get rid of any more starch.
Now here is the secret...walk away from the onion rings.
Don't even think about frying these guys until the coating dries.
I love doing the messy part of the recipe ahead of time.


Dump the left over starch in the garbage and rinse the bowl out with water right away.
The longer the starch dries in the liquid dribbles, the harder it will be to clean the bowl.


Down the drain with the onion flavored milk...unless you want to use it for something else.
It might be sort of good in corn bread...or something.


About an hour later...
I am going to fry the onion rings in this pan.
That funny scooper is called a spider.
Spiders are the perfect scooper for fishing fried things out of hot oil.


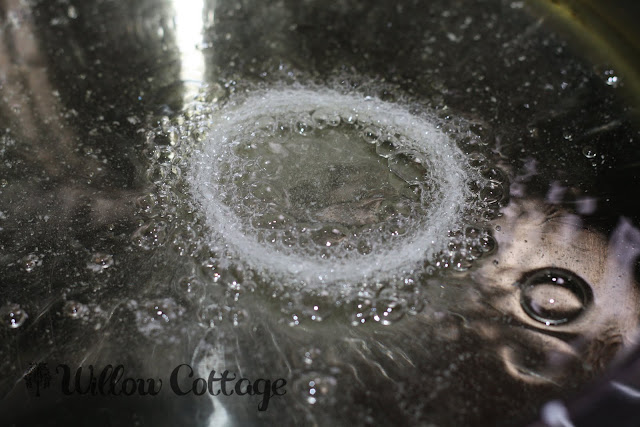
I love those wrinkle lines the oil gets when it is heating up.
Heat your oil over medium heat.  
I am using roughly two cups of oil.
Do not put onions in the oil until it has reached 350 degrees.


That is a happy onion ring.
That is exactly the bubble action you want to see when you drop a ring into the oil.
If you don't see those bubbles it means your oil is too cool.
If you fry something in cool oil, you will get a greasy product.  
Hot oil is important.


Fry just a few rings at a time until they are golden brown-ish.
If you put too many rings in the pan, it will cool the oil down and you will get greasy rings.


Let them drain on a paper towel and sprinkle them with a bit of salt while they are still hot.


They look sooo good.


They are crunchy, onion-y, and yummy.
Enjoy!


For more Willow Cottage football food ideas check out:
and


I am linking to Foody Friday at Rattlebridge Farm {Designs by Gollum}.